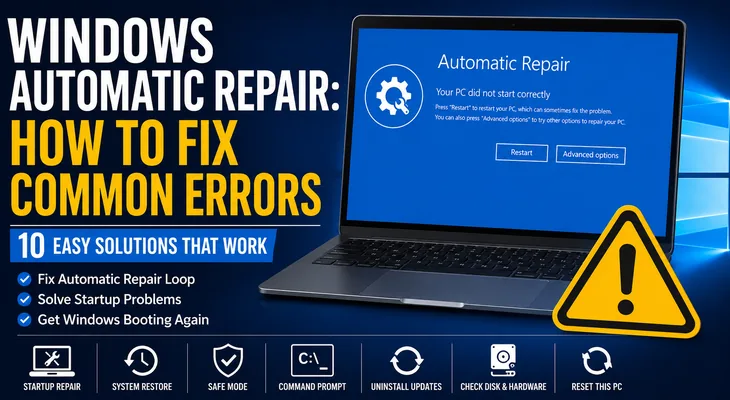
If Windows Automatic Repair keeps appearing on your computer, or your PC gets stuck in an Automatic Repair loop, you may be dealing with a startup problem.
Windows uses the Windows Recovery Environment (WinRE) and Startup Repair to diagnose certain problems that prevent the operating system from starting correctly. Microsoft says Startup Repair can attempt to fix issues such as damaged system files, boot configuration problems, incompatible drivers, and some registry errors.
The good news is that you don’t necessarily need to reinstall Windows immediately.
In this guide, we’ll start with simple solutions and then move to more advanced recovery options.
Important: If Windows can still start, back up your important files before trying advanced recovery or reset options.
What Is Windows Automatic Repair?
Windows Automatic Repair is part of the Windows Recovery Environment. When Windows has trouble starting correctly, it may automatically enter recovery mode and try to diagnose the problem.
Windows RE includes several tools, including:
- Startup Repair
- System Restore
- Startup Settings
- Command Prompt
- Uninstall Updates
- Reset this PC
- UEFI Firmware Settings
Microsoft explains that Windows RE is designed to help troubleshoot and repair common problems that prevent Windows from starting normally.
Why Does Windows Automatic Repair Keep Appearing?
Automatic Repair may appear because of different startup problems.
Common causes include:
- Corrupted system files
- Damaged boot configuration data
- Incompatible drivers
- Failed Windows updates
- Recently installed software
- Disk or file-system problems
- Unexpected shutdowns
- Hardware problems
- Boot configuration errors
If your computer repeatedly returns to the same Automatic Repair screen, Windows may be unable to resolve the underlying startup problem automatically.
1. Restart Your Computer
Start with the simplest solution.
If Windows entered Automatic Repair because of a temporary startup problem, a normal restart may resolve it.
Try this:
- Select Continue if that option is available.
- Allow Windows to restart.
- Check whether Windows loads normally.
If the Automatic Repair screen returns, continue with the next solution.
2. Use Startup Repair
If Windows cannot start normally, Startup Repair is one of the first recovery tools you should try.
Microsoft says Startup Repair automatically checks for certain startup problems and attempts to repair them.
To run Startup Repair:
- Open Advanced options.
- Select Troubleshoot.
- Select Advanced options.
- Click Startup Repair.
- Choose your Windows account if requested.
- Enter your password if necessary.
- Wait while Windows diagnoses the problem.
The computer may restart during the process.
If Startup Repair successfully fixes the problem, Windows should boot normally afterward.
3. Try System Restore
If Automatic Repair started after a recent software installation, driver change, or system modification, System Restore may help.
System Restore can return Windows system files and settings to an earlier restore point without normally removing personal documents.
From Windows Recovery Environment:
- Select Troubleshoot.
- Choose Advanced options.
- Select System Restore.
- Choose your account.
- Enter your password if requested.
- Select an appropriate restore point.
- Follow the instructions to complete the restoration.
Microsoft lists System Restore as a recovery option when Windows is not working correctly, including situations where Startup Repair does not resolve a startup problem.
You can also read your related guide:
Internal link: Windows 10 System Restore
4. Try Safe Mode
Safe Mode starts Windows with a limited set of drivers and services.
This can be useful when a recently installed driver or application is causing startup problems.
To access Safe Mode:
- Go to Troubleshoot.
- Select Advanced options.
- Choose Startup Settings.
- Click Restart.
- After the restart, select Enable Safe Mode.
Microsoft documents Startup Settings as a Windows RE option for changing startup behavior and troubleshooting Windows.
You can also use your existing article:
Internal link: Windows 10 Safe Mode
If Safe Mode works
If Windows starts successfully in Safe Mode, investigate recent changes such as:
- New drivers
- Recently installed applications
- Windows updates
- Startup programs
- Security software
5. Uninstall a Recent Windows Update
Sometimes a startup problem begins after a Windows update.
Windows Recovery Environment provides an Uninstall Updates option that can be useful when a recent update is suspected of causing the problem. Microsoft lists uninstalling a recent update among Windows recovery options for PCs that develop problems after an update.
Try it from WinRE:
- Select Troubleshoot.
- Open Advanced options.
- Select Uninstall Updates.
- Follow the instructions shown on screen.
If the problem started immediately after an update, this is worth trying before more destructive recovery options.
6. Use Command Prompt to Check Windows System Files
If Startup Repair doesn’t solve the problem, Command Prompt provides more advanced troubleshooting options.
From:
Troubleshoot → Advanced options → Command Prompt
you can run Windows repair commands.
For example:
sfc /scannowHowever, when Windows is unable to boot, the correct drive letter for the Windows installation may not always be C: inside recovery mode.
Therefore, advanced users should first identify the Windows installation drive before running offline repair commands.
If you’re not comfortable with Command Prompt, don’t randomly run commands from the internet. An incorrect command can make troubleshooting more complicated.
7. Check the Windows Boot Configuration
Automatic Repair can also appear when Windows has trouble with its boot configuration.
Windows uses boot configuration information to determine how the operating system should start.
If boot-related data has become damaged, Windows may repeatedly enter recovery mode.
Before changing boot configuration
Make sure you’ve already tried:
- Startup Repair
- System Restore
- Safe Mode
- Uninstall Updates
If those options don’t work, Command Prompt-based boot troubleshooting may be appropriate.
This is an advanced step, so don’t run boot commands unless you understand what they do.
8. Check for Hardware or Storage Problems
Sometimes Automatic Repair is not caused by Windows itself.
A failing storage drive can cause:
- Startup failures
- File corruption
- Repeated Automatic Repair
- Slow booting
- Unexpected freezes
- Missing files
If your PC has recently become unusually slow or you hear unusual noises from a mechanical hard drive, back up important data as soon as possible.
For persistent storage-related problems, hardware diagnostics may be necessary.
You can also read:
Internal link: Windows Hard Drive Errors: How to Fix Them
Note: The URL above is only an existing WindowsMedic URL from your supplied list, but its title does not match the “Windows Hard Drive Errors” topic. Do not use that link as an internal link unless the URL actually contains the intended article.
So for now, leave this internal link out unless you confirm the correct URL.
9. Disconnect Recently Added Devices
If the Automatic Repair problem began after connecting new hardware, disconnect unnecessary external devices.
Try removing:
- USB drives
- External hard drives
- USB hubs
- Printers
- External adapters
- Other recently connected peripherals
Then restart the PC.
A faulty device or driver can sometimes interfere with startup.
If Windows starts after disconnecting a particular device, reconnect devices one at a time to identify the possible cause.
10. Use Reset This PC Only as a Last Resort
If none of the recovery options work, Reset this PC is another option.
But don’t immediately reset Windows just because Automatic Repair appears.
Microsoft explains that resetting Windows reinstalls the operating system and gives you options that can keep or remove personal files, while apps and settings are reset.
Before resetting
Back up important files if you can.
Also make sure you have access to your BitLocker recovery key if your device is encrypted. Microsoft specifically warns that encrypted devices may require the BitLocker recovery key when using certain recovery tools.
What to Do If Automatic Repair Is Stuck in a Loop
If you see something like:
Preparing Automatic Repair
followed by:
Diagnosing your PC
and then Windows returns to the same screen repeatedly, you’re likely dealing with an Automatic Repair loop.
Try these solutions in order:
- Restart the computer.
- Run Startup Repair.
- Try System Restore.
- Boot into Safe Mode.
- Uninstall a recent Windows update.
- Use Command Prompt for advanced repair.
- Check storage and hardware.
- Consider Reset this PC only after backing up your data.
You can also read your existing related article:
Internal link: Windows 10 Automatic Repair Loop
How to Prevent Automatic Repair Problems
You cannot prevent every Windows startup problem, but a few habits can reduce the risk.
Keep Windows updated
Install appropriate Windows updates and restart your PC when required.
Keep drivers updated
Use reliable driver sources, especially your PC or hardware manufacturer’s official support pages.
Avoid forced shutdowns
Don’t repeatedly hold the power button to turn off a normally running computer unless the system is completely unresponsive.
Keep backups
Important documents should be backed up to another drive or a trusted cloud service.
Monitor storage health
If your storage device begins showing errors, don’t ignore the warning signs.
Frequently Asked Questions
What does Windows Automatic Repair mean?
It means Windows has detected a startup problem and has entered its recovery environment to diagnose or repair issues that may be preventing normal startup.
Why is my PC stuck on Automatic Repair?
A damaged system file, boot configuration problem, incompatible driver, failed update, storage problem, or another startup issue can cause Windows to repeatedly enter recovery.
How do I fix Windows Automatic Repair without losing files?
Try Startup Repair, System Restore, Safe Mode, and uninstalling a recent update before considering Reset this PC. These options are less destructive than reinstalling Windows.
Can I use Safe Mode to fix Automatic Repair?
Yes. If Windows can start in Safe Mode, you can investigate recently installed drivers, applications, updates, and startup programs.
Should I reset my PC if Automatic Repair doesn’t work?
Not immediately. Try the available recovery options first. If those fail, Reset this PC may be considered after backing up important files.
Does Automatic Repair mean my hard drive is damaged?
Not necessarily. Automatic Repair can be triggered by software, drivers, boot configuration problems, corrupted files, updates, or hardware issues. A storage problem is only one possible cause.
Final Thoughts
Windows Automatic Repair can be useful when your PC cannot start normally, but it can become frustrating when Windows gets stuck in a repair loop.
Start with Startup Repair, then try System Restore, Safe Mode, or uninstalling a recent update. If those options don’t work, advanced Command Prompt troubleshooting and hardware checks may be necessary.
Avoid resetting or reinstalling Windows as your first step. Always try to protect your important files before performing major recovery operations.
If the problem continues even after Windows recovery options have been exhausted, the underlying issue may involve the storage device, hardware, or a deeper Windows installation problem.
Recommended Internal Links
Use only the links that are actually relevant and live on your site:
Don’t add unrelated links just to increase the number of internal links.